Atrain
-
Posts
9 -
Joined
-
Last visited
-
Days Won
5
Recent Profile Visitors
1,713 profile views
Atrain's Achievements
")


-
2023 - What's your insurance premium looking like?
Atrain replied to GPJake's topic in Everything Else 💬
Motorcycle: 2022 ktm 890 duke r Rider: 39 years old, male Full Coverage or Liability: Full coverage Policy Changes none Hoping I don’t jinx myself but my premium is less than yours with an at fault accident. Supposed to drop off after 3 years so maybe that’s why? $395.36 for the year. Maybe coverage is different. I dunno. I got Dairyland. My personal experience with progressive has been terrible. Used to have em and they increased my rates every year in my early twenties. Same bike, no accidents. Now I (sorta) deal with progressives claim adjuster, and again bad experiences. Always good to shop around every year. Insurance companies aren’t loyal to you, no need to be loyal to them. -
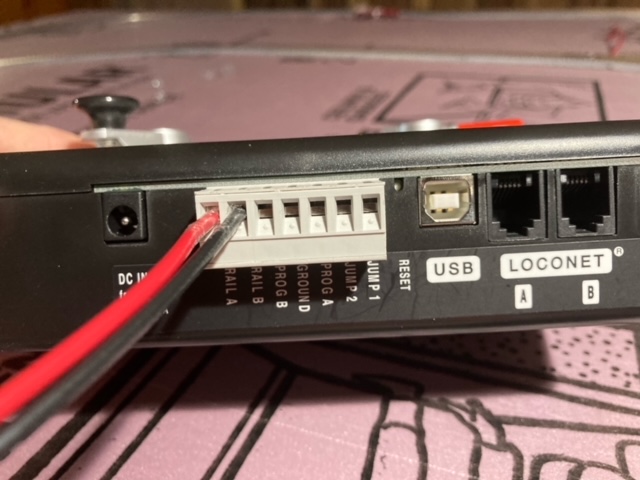
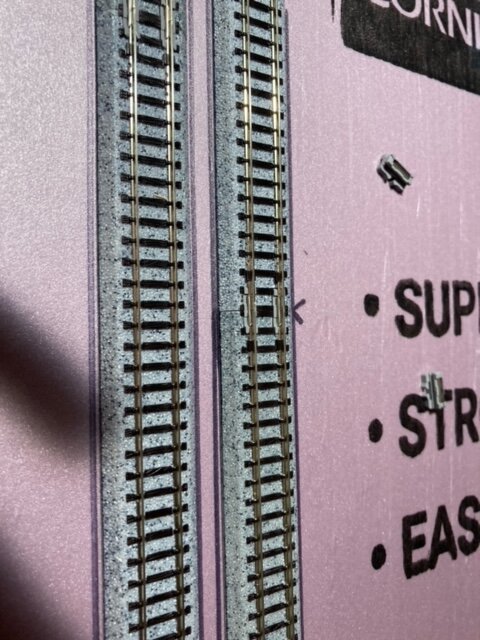
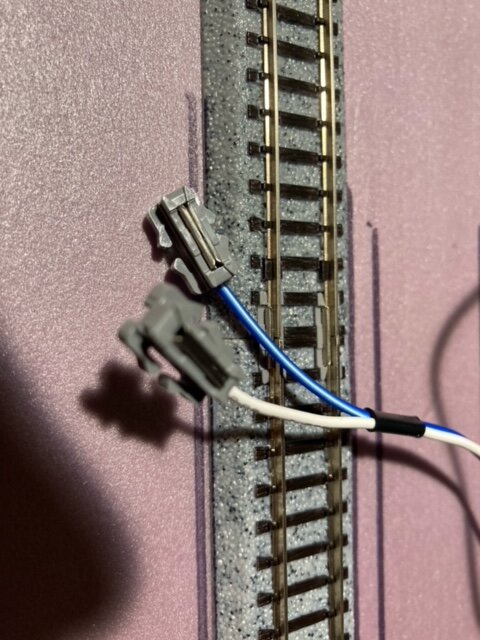
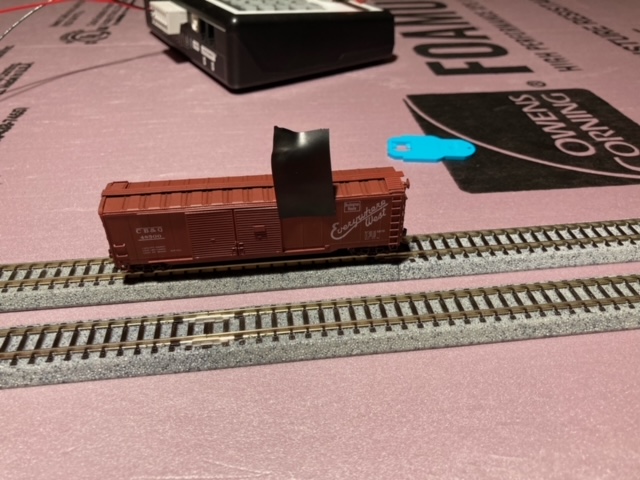
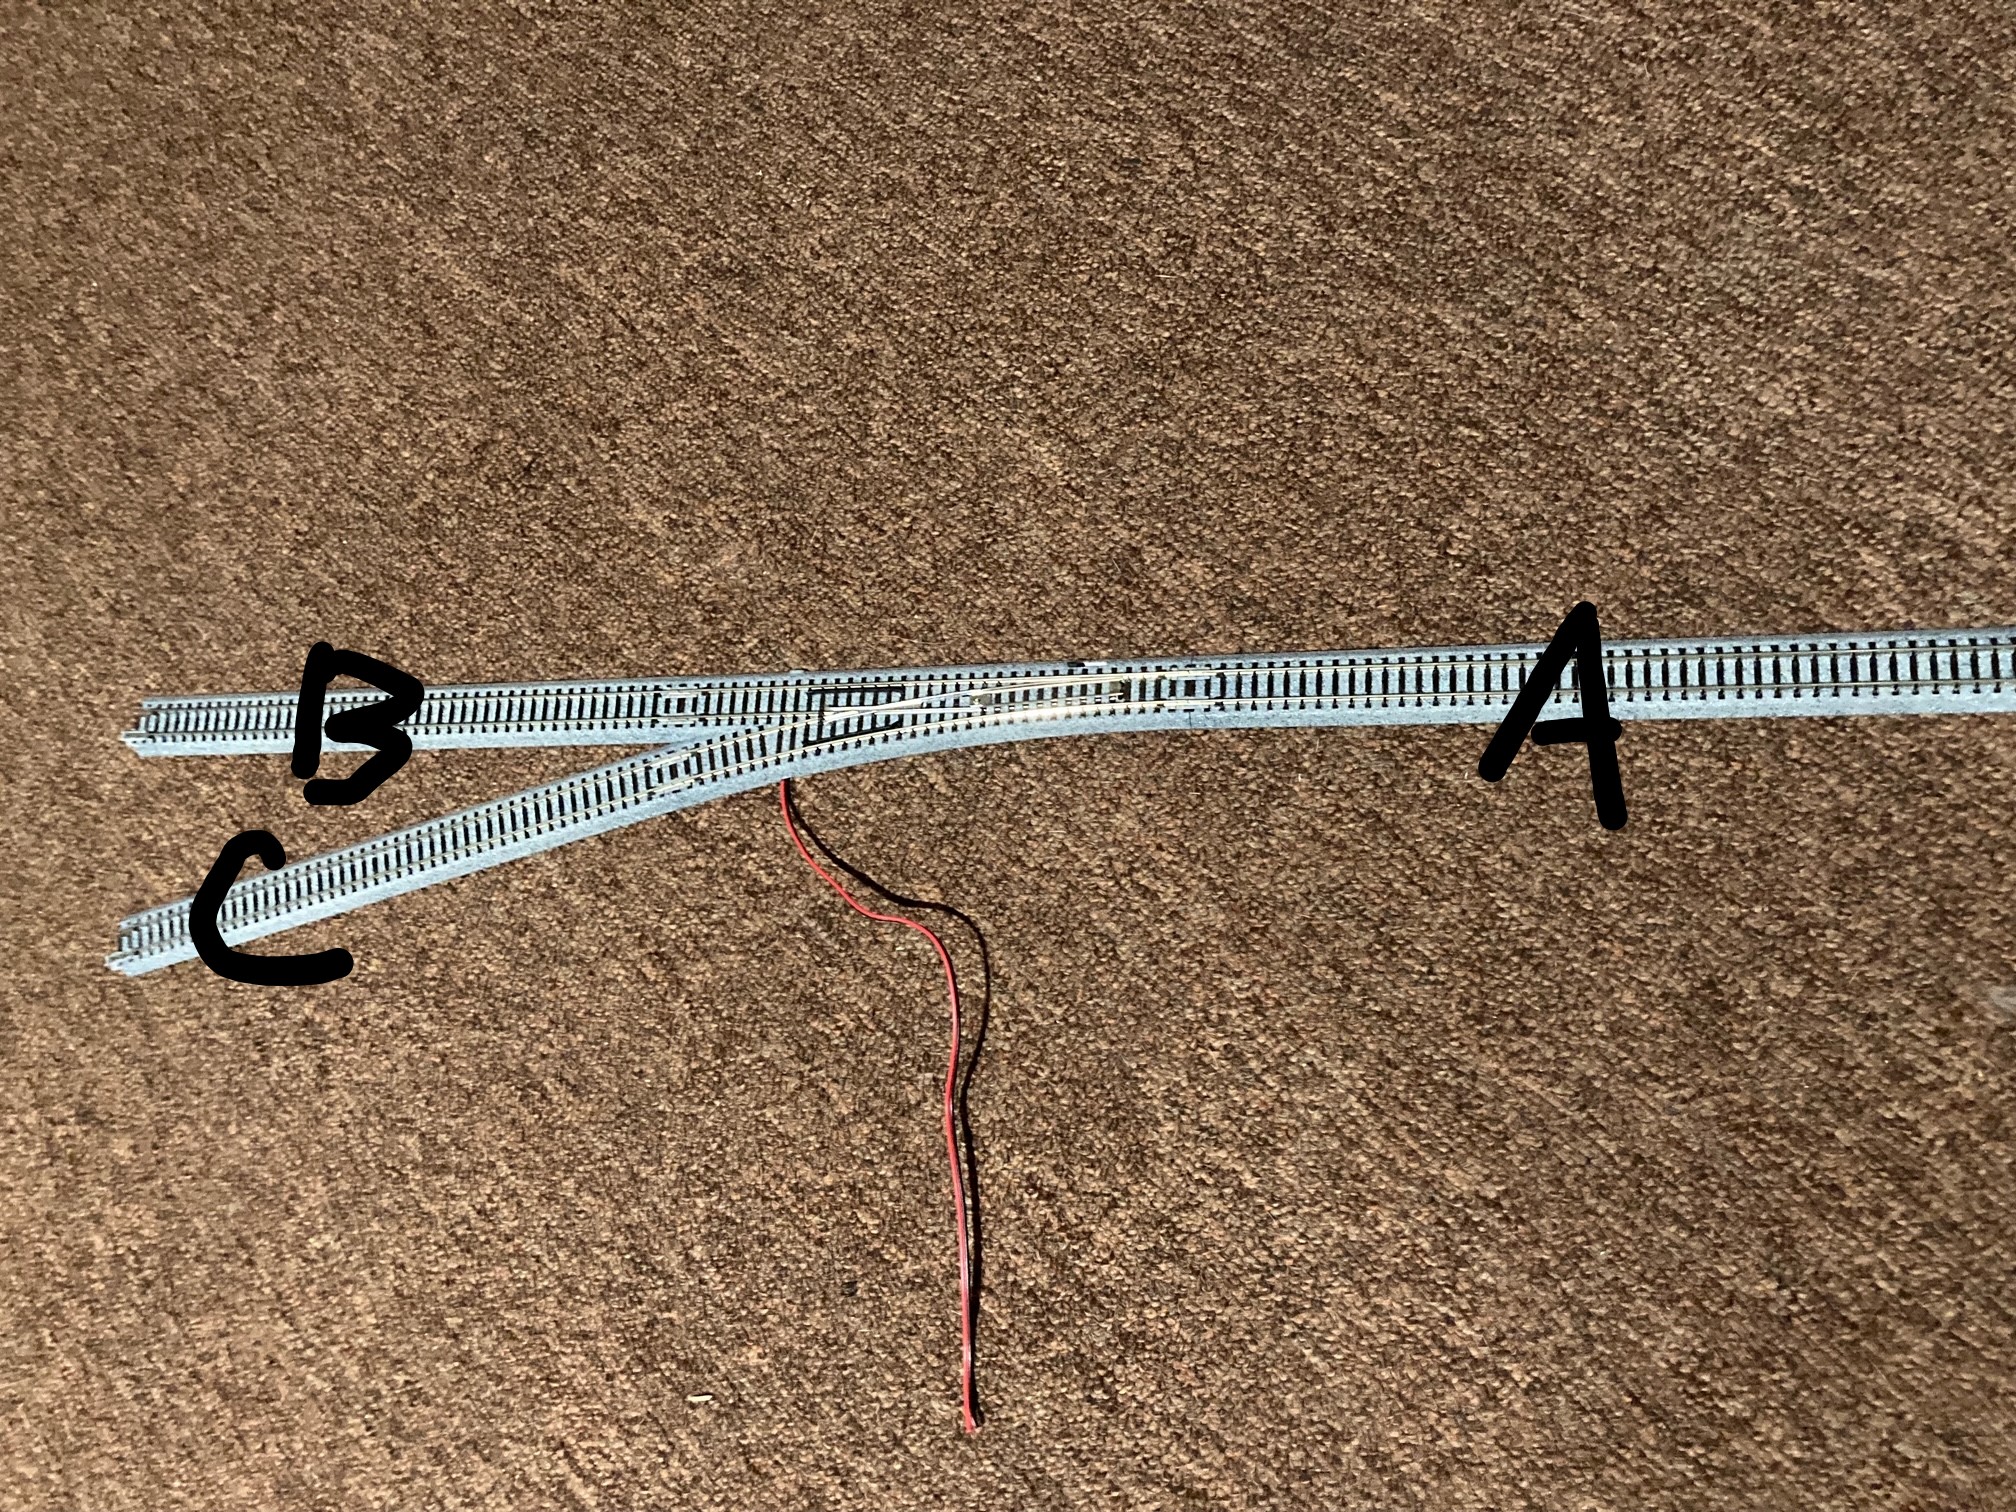
WIRING TIME!!! This is gonna be along post, so buckle in... If you ever had a train set as a kid, you probably remember hooking two wires up to the track, then to the power pack. That's called DC or direct current. In that system, to make the train go faster you just increase current to the track. Slower, you decrease current. Super simple, and great for small layouts or running one train, but if you want to run multiple trains or a large layout, you need to separate your layout into blocks. It can become a wiring nightmare in a hurry. In comes DCC or digital command control. It supplies the track with the same amount of power no matter what, and sends a signal to a decoder in each locomotive. This lets you control multiple trains without any extra wiring. All you need to do is dial in the locomotives number to control it. The equipment is more expensive, and takes a little more time setting up, but IMO the results are worth it. This is what I'm wiring my layout to use. I'm just running two main bus wires, then feeders from those to the track. There's lots of guides on how to wire for DCC, and it can get very confusing very quickly. Some say you need feeders at every connection, some say just one feeder on the layout, and every combination in between. There's no wrong way to do it, but wiring every connection can get expensive, so I just wired every 'block'. The switches I have are power routing, so if A is powered, then B or C is powered depending on which way the switch is going, but it can't power both. Using switches, I separated my layout into 'blocks' You can see I have feeders for each 'block' so there's no power interruption. Picture of the feeders. Wires soldered onto the bottom of connectors. These will replace the track connectors. Marking the joint and track location so I know where to drill holes and place the track back into its spot. Hole drilled. It'll sit flush when done. Picture of the red and black bus wires, and the blue and white feeder wires hooked to them. It's very important you keep the same connections and don't hook up opposite rails or it won't work. And how do you keep track of what rail is what? Simple. Place a car with a marking on the track and whatever side the marking is on is whatever color you choose. In my case the tape side is the blue wire, then goes to the black bus wire. This also gives you a bonus of checking all the other rail connections as you push the car around the track. After everything is hooked up, just plug in the bus wires and run a locomotive, looking for dead spots or any other issues. Unfortunately I plugged in the wrong power pack and fried my controller, so everything's on hold until I can get a new one.

-
I haven't totally been slacking these past few months. Also got a couple buildings put together. First up, a simple dairy queen. Then, a drive in theatre a loading dock a warehouse/storage facility (work in progress) and finally, an engine shed (also work in progress) It's fun building these models, and relaxing too. Trying different painting techniques on different materials. So far my favorites are the ones made of wood. You can paint or stain them, and the texture is more realistic.
-
Update since I got reminded of it the other day too. Took a bit of time to work out a trackplan. I wanted two loops so I could just watch trains run, but that gets boring. I came up with a plan to split the layout in two pieces and have a city and a countryside. The idea is to pick up goods/passengers from one side, and take them to the other to unload. More on that later. Added 2 inch foam insulation for the base. First it acts as an insulator to keep noise levels down a bit. More importantly, you can cut it away to make valleys, and add more to make hills. Super light, super easy to work with, just a little messy. Laid out my trackplan to see how everything fits. It's a little close to the edges in some spots, so I'll have to do a bit of tweaking. Picture of the track almost overhanging the edge. It's a recipe for disaster. Couldn't help but run a couple trains just for fun. Next up wiring and starting to shape the landscape!
-
It's definitely a long term project, potentially never finished, going by others setups. I probably will add some bracing when I get everything leveled out.
-
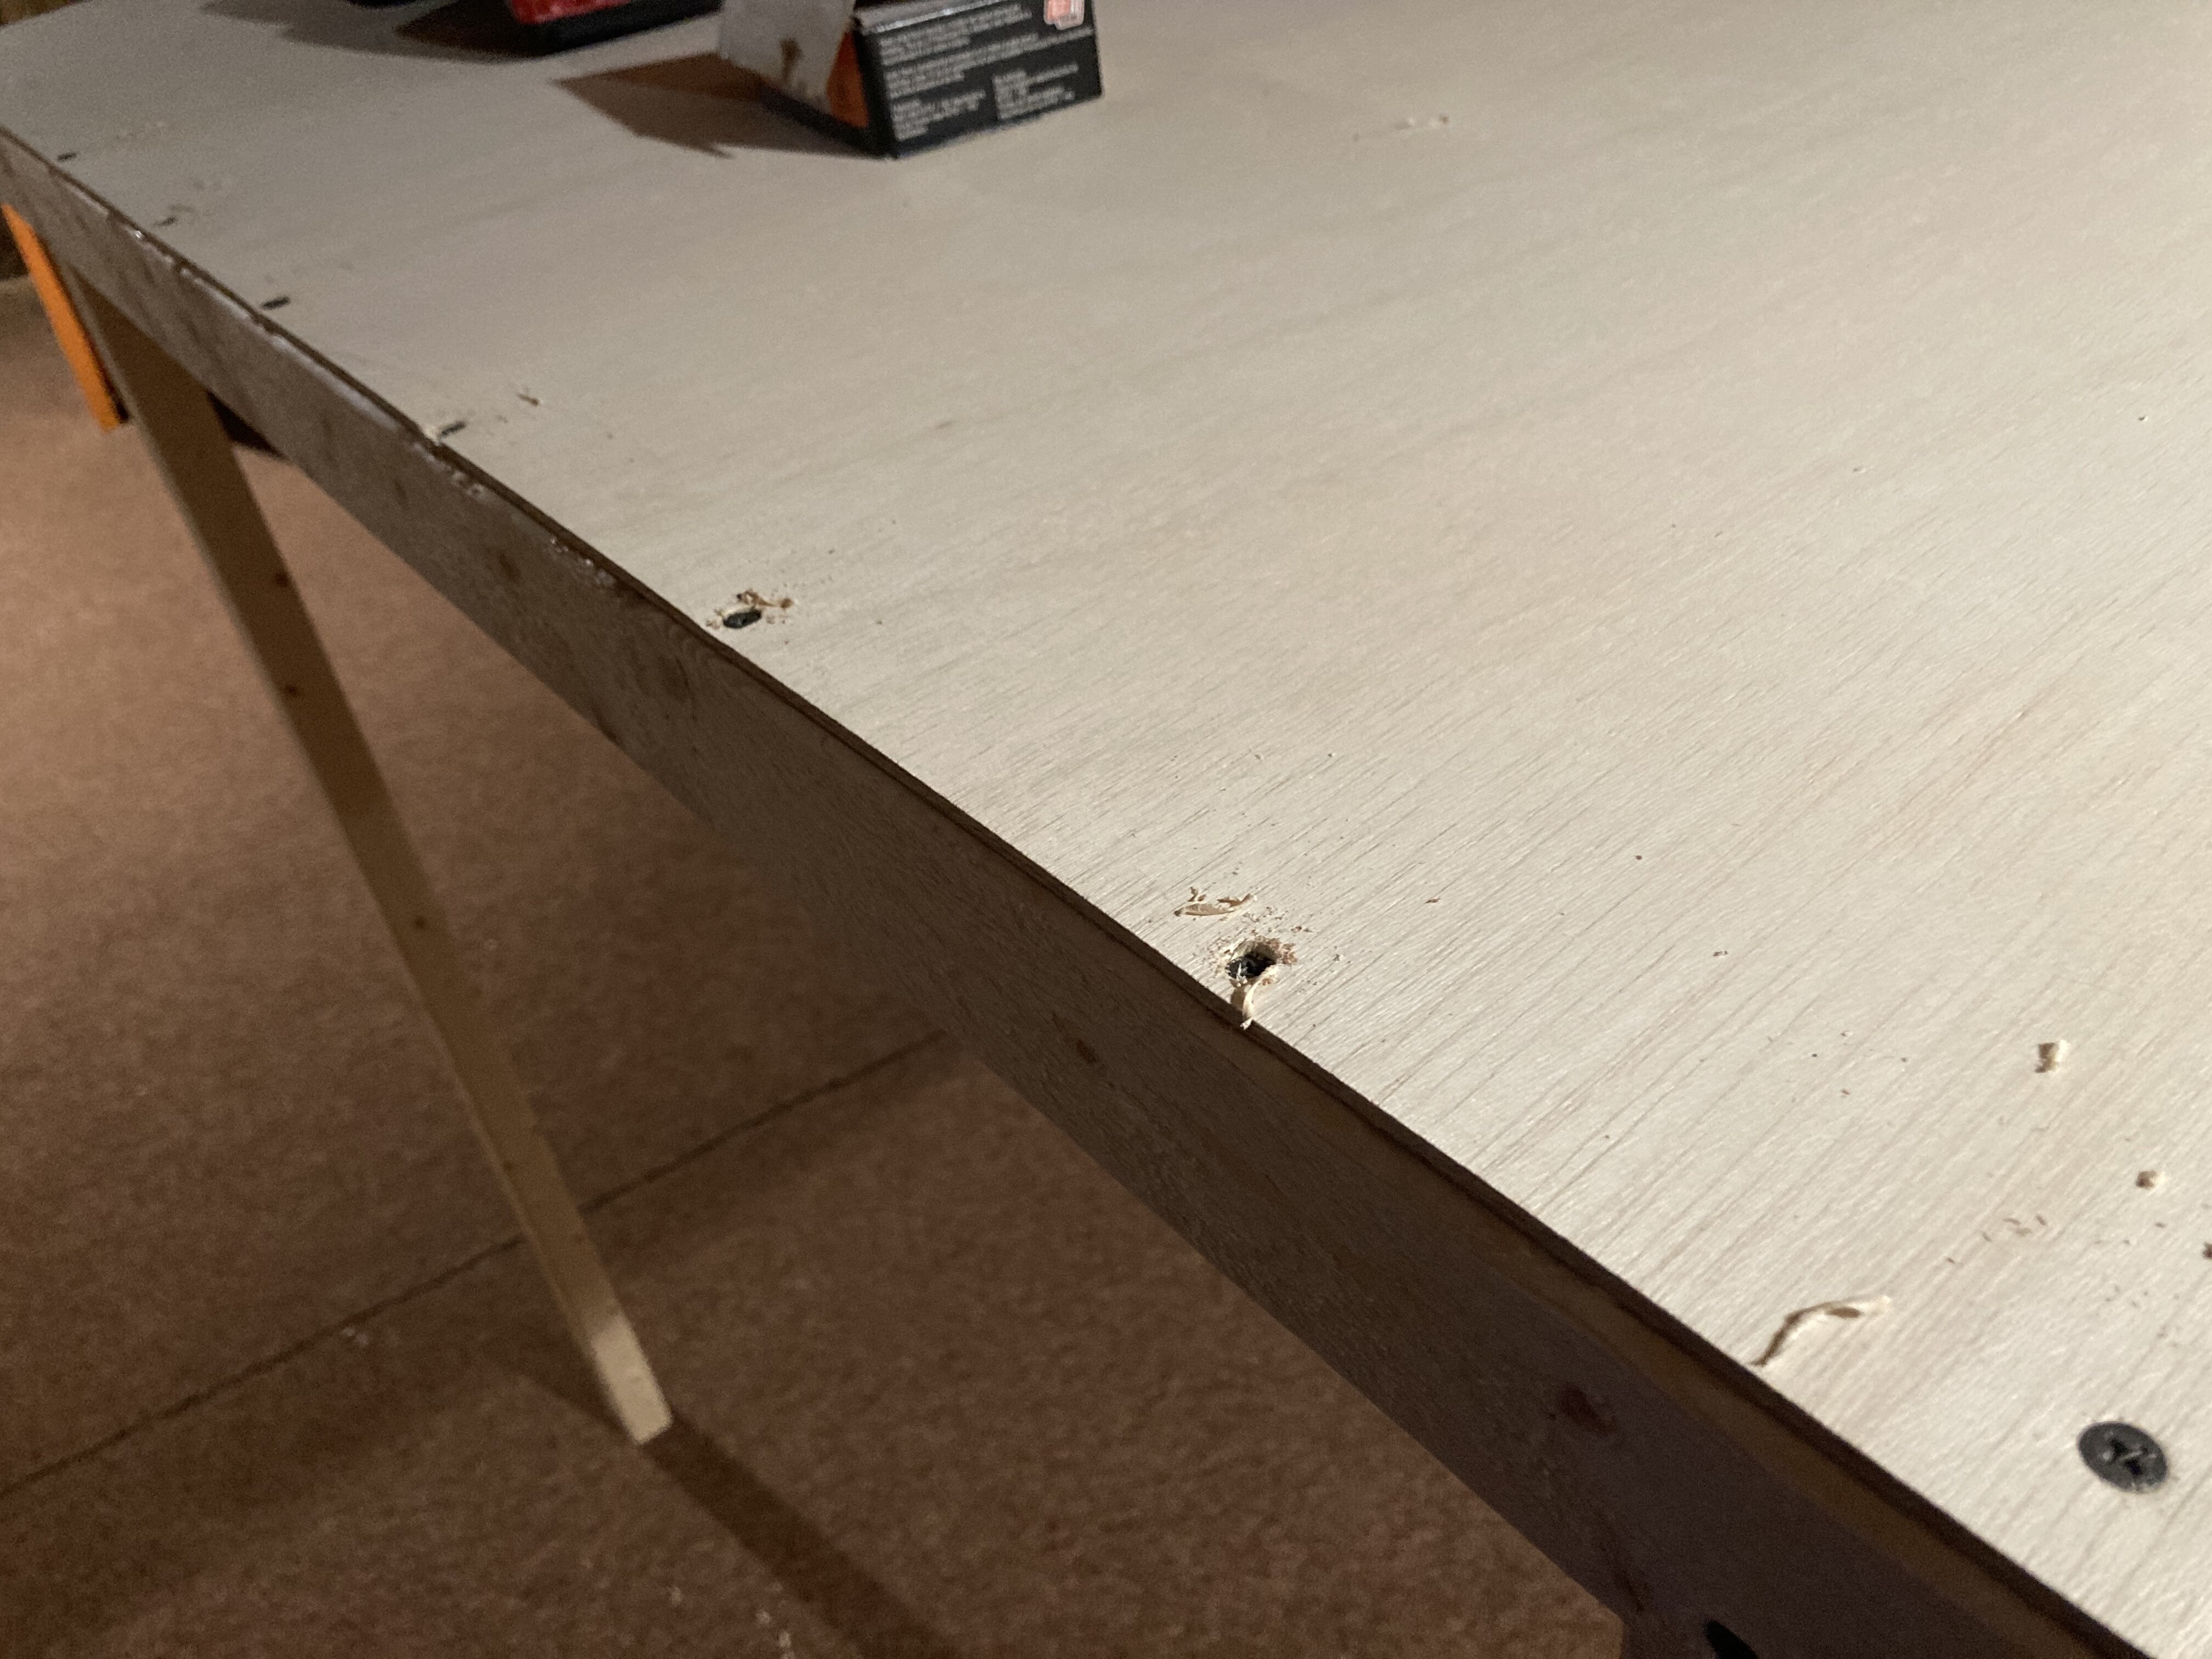
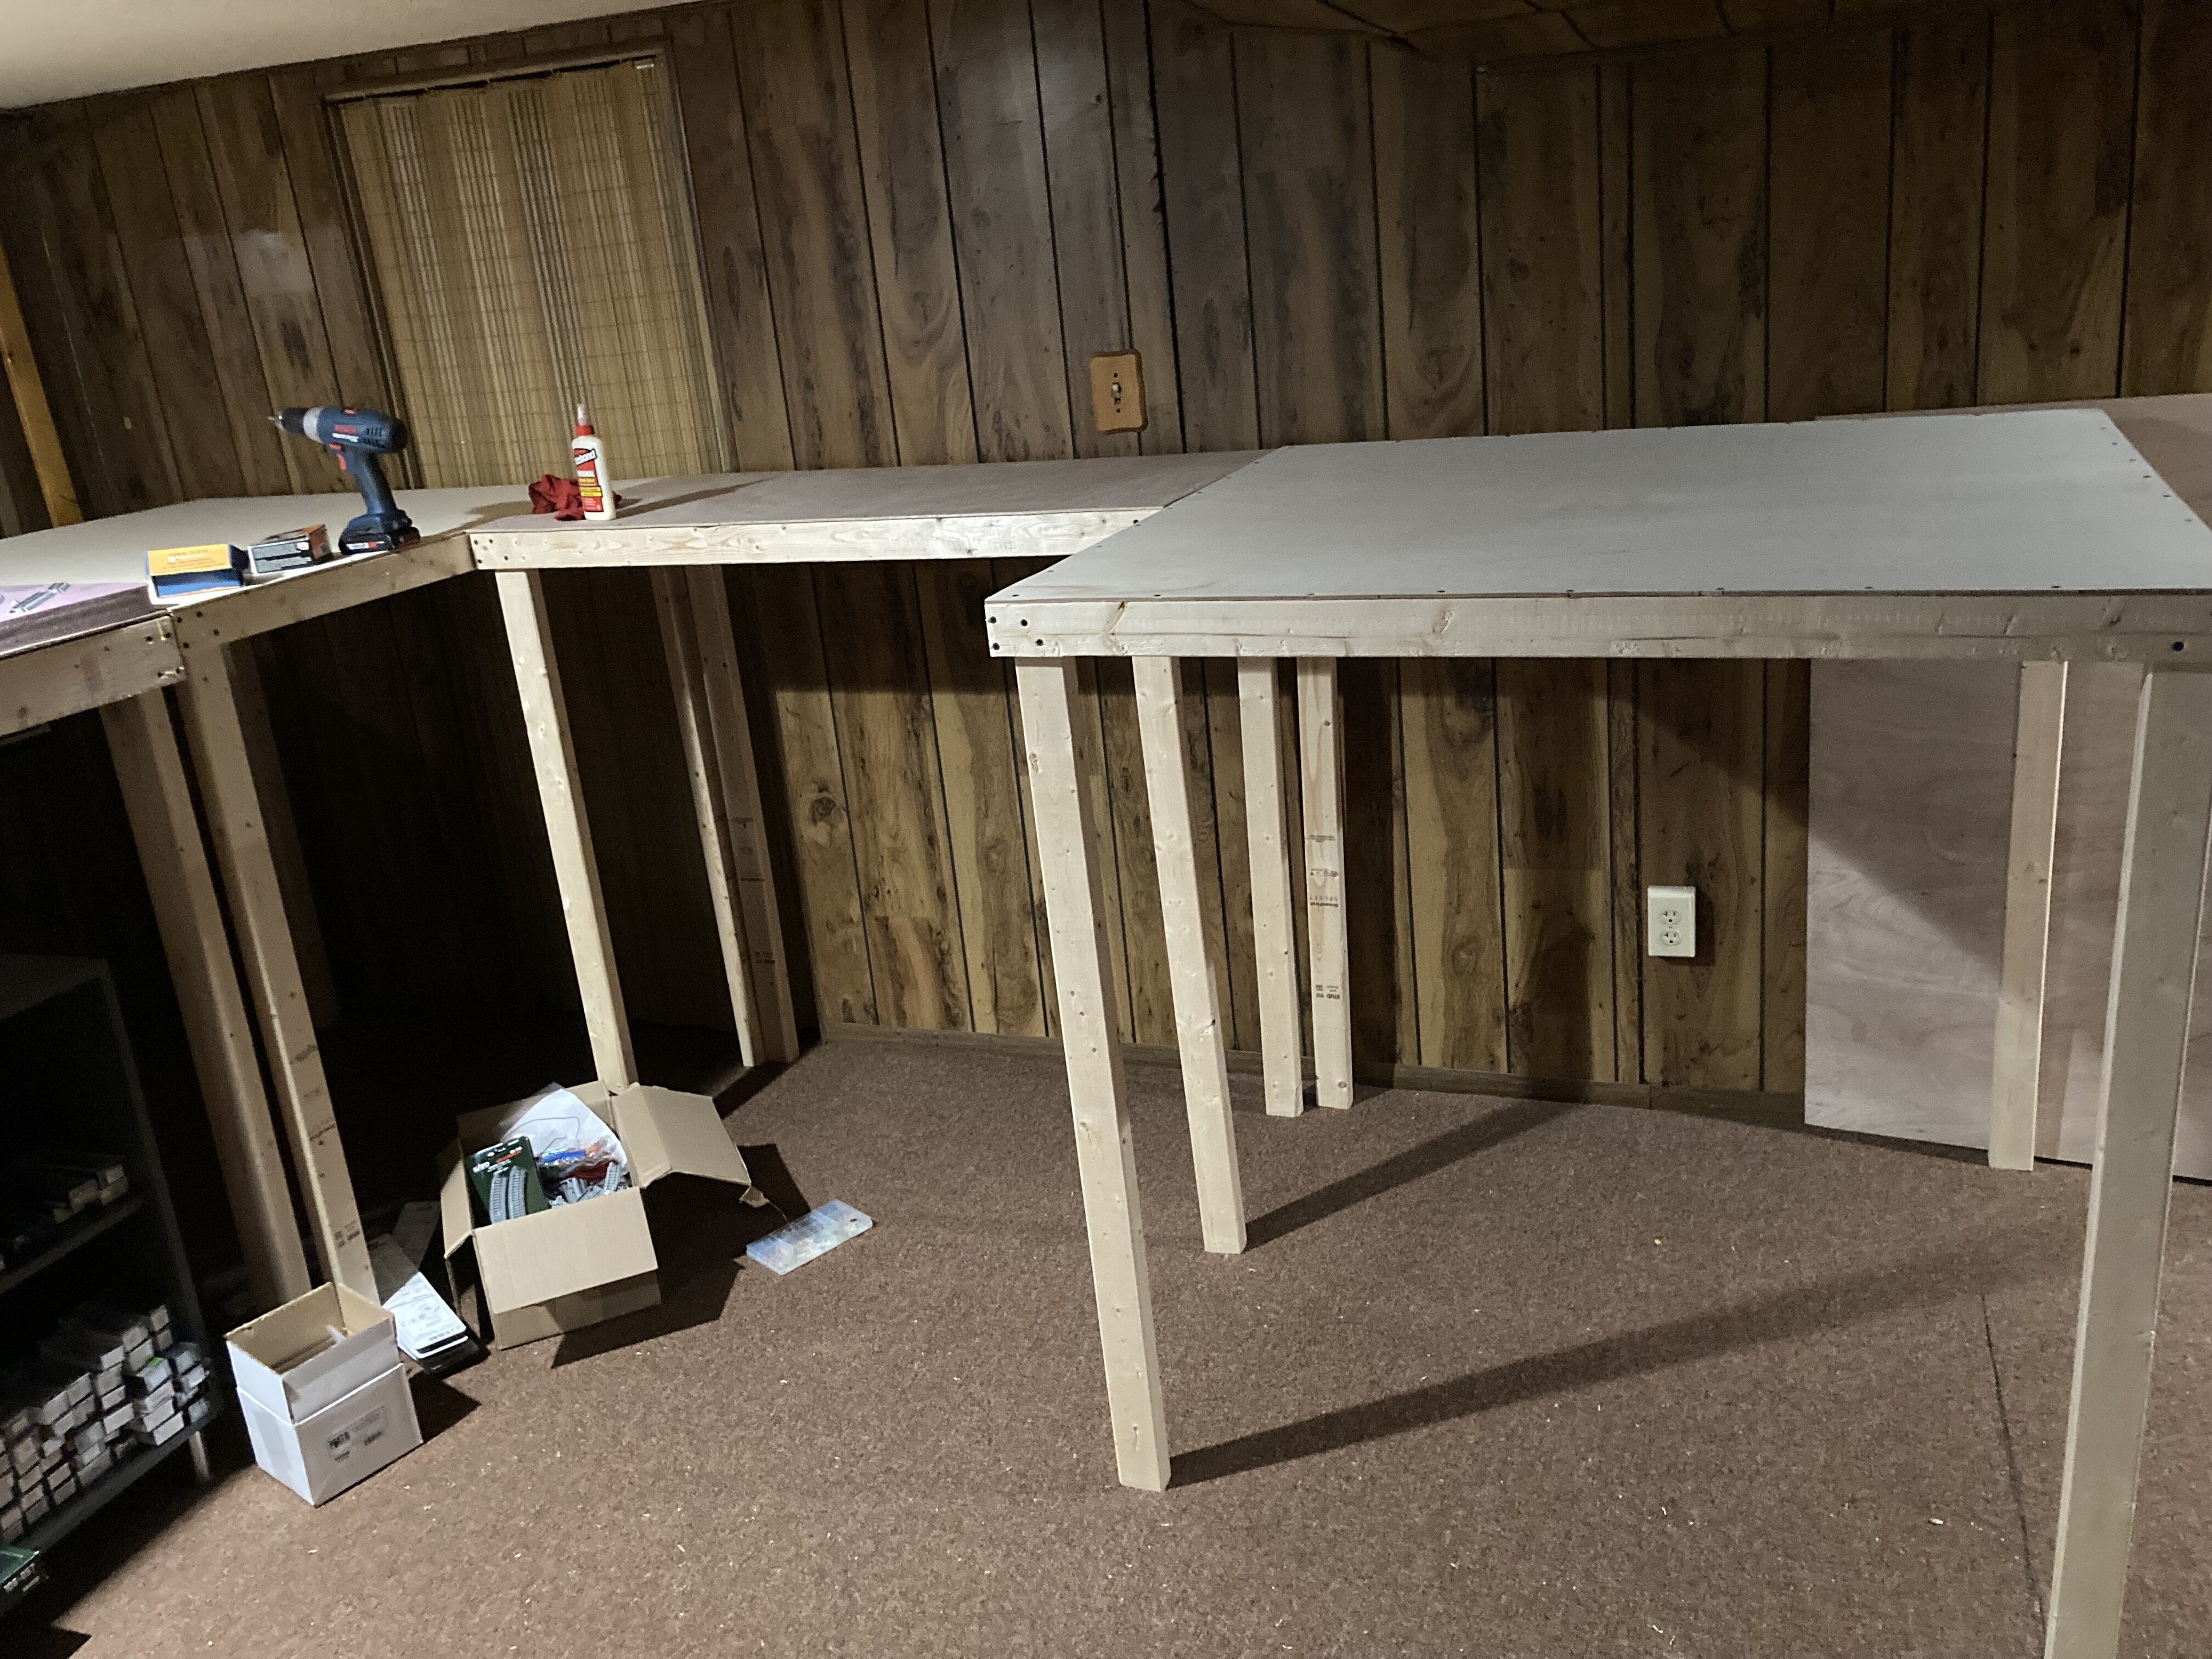
I used to love playing with trains on my parents kitchen floor when I was little. Now that I have my own house and plenty of space, I decided to start building a table for a layout in my basement. Definitely a long term project, but figured I'd start keeping track of what I'm doing to keep myself motivated to work on it. Here's what I accomplished this past weekend. Got some 2x3 boards for legs and 1x3 furring strips for framework. Cut some 1/8 in. plywood into two 4x4ft pcs. and one 2x4ft pc. to make the tabletops, with a 4x8 ft. pc. for the other top. Laying out the framework to make sure it fits. Nothing fancy, just butt joints. Don't forget to predrill the holes! Glue and drywall screws to hold everything together. Yea I know use wood screws but meh. It's what I got lying around. Finished 4x4 frame. Tabletop with pre-drilled holes to hold it on. More glue and screws. Finished 4x4 and 2x4 tables. The tables so far...there's a 4x8 ft table with a 4x4 ft table in the corner, followed by the 2x4 ft table and another 4x4 ft table to cap it off. Laid down a bit of track just to get a train running, but still need to level everything out, attach them to each other, add a foam base, and LOTS of other stuff. Hopefully get more work done this weekend.
-
I put these in discord but I’ll post em up here too
-
I’m down to just hang out and meet people. Maybe give my bike a quick bath